Minecraft Server Setup Guide for Beginners — Step by Step 2026
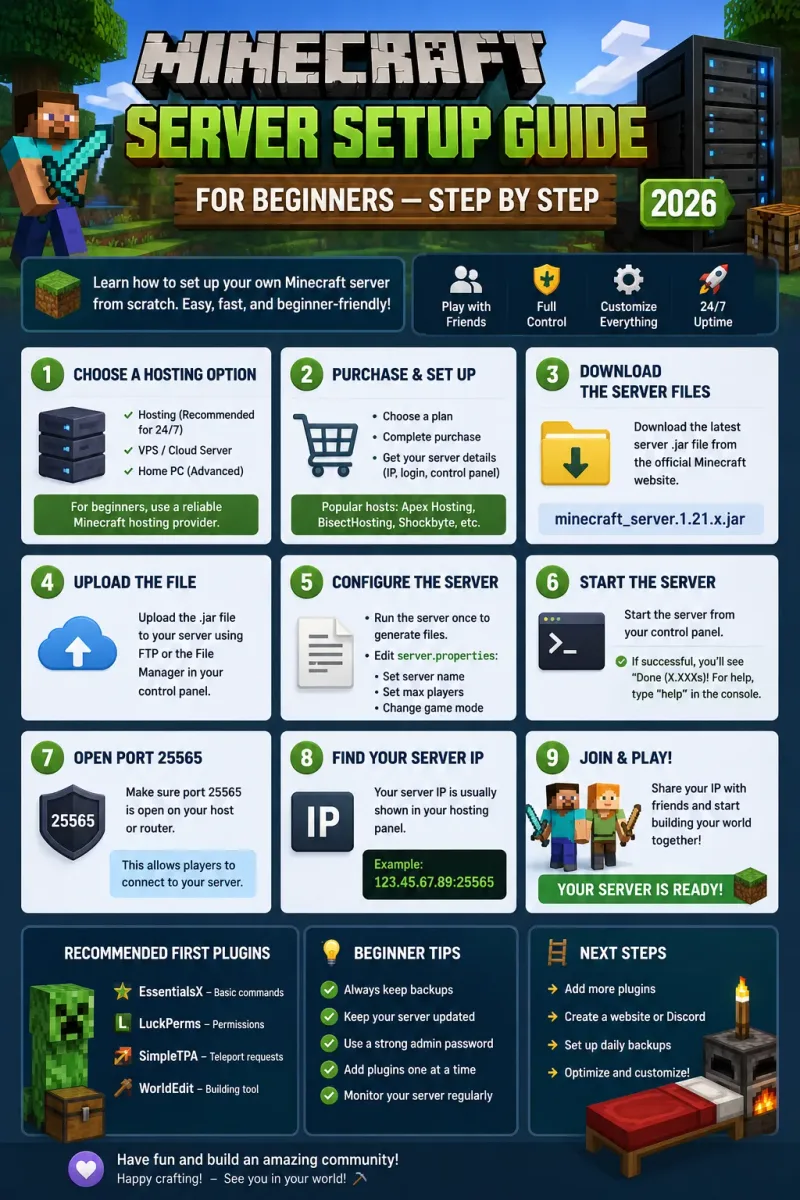
Setting up your first Minecraft server doesn't have to be intimidating. With managed hosting, you can go from 'I want a server' to 'players are online' in under 10 minutes. Here's the complete step-by-step guide for absolute beginners.
Step 1: Choose Your Hosting Plan
For a small server with 5-10 friends: 1-2GB RAM. For a community server with 10-25 players: 2-4GB RAM. For a public server expecting 30+: 4-8GB RAM. All CyberNex plans come with global nodes, DDoS protection, and one-click installers. Start with the 2GB plan at € 700/mo if you're unsure — you can upgrade instantly with zero downtime.
Step 2: Select Your Server Type
Vanilla — the official Minecraft server jar. Simple but limited. PaperMC — optimized fork with plugin support. Use this if you want plugins. Fabric — lightweight mod loader. Use this for performance mods and vanilla+ experiences. Forge — heavy mod loader for large modpacks. New server owners should start with PaperMC — it's the most flexible and best-documented option.
Step 3: Configure Basic Settings
After deployment, open your control panel's file manager. Edit server.properties: Set motd (your server description), max-players (match your plan), difficulty (peaceful/easy/normal/hard), gamemode (survival/creative), pvp (true/false), online-mode (true — keeps cracked players out). Save and restart your server.
Step 4: Install Essential Plugins
Start with: EssentialsX (core commands like /home, /spawn, /warp), LuckPerms (permission manager), WorldEdit (building tool), WorldGuard (region protection), GriefPrevention (land claiming), CoreProtect (block logging — catch griefers). Install one at a time from the control panel's plugin installer. Restart after each one and verify it loaded with /plugins in console.
Step 5: Set Up Permissions
LuckPerms manages what players can do. Create groups: default (basic commands), member (trusted players), moderator (staff), admin (full access). Use /lp group default set home to give all players access to /home. Don't give OP to anyone — use LuckPerms instead. OP grants full server access and is a security risk.
Step 6: Build Your Spawn
Your spawn is the first thing players see. Keep it simple — a protected platform with welcome signs, rules, and a portal to the survival world. Use WorldEdit to create the platform quickly. Set spawn protection with /setworldspawn. Teleport new players to spawn with EssentialsX spawn-on-join feature.
Step 7: Go Live and Grow
Share your server IP with friends and in Minecraft server lists. Join global gaming communities on Discord and Facebook. Update your plugins regularly (check for updates weekly). Engage with your players — a server owner who plays with the community keeps players around longer than one who only does admin work.
Your first server doesn't need to be perfect. Start small, learn as you go, and upgrade resources as your community grows. CyberNex's global infrastructure ensures your players get great performance from day one, and our support team is available 24/7 if you get stuck.
More in Minecraft
Hands-on Guides
Deploy your server in 60 seconds
Get your Minecraft, FiveM, Rust, or CS2 server running on our global infrastructure before your coffee gets cold. Starting at € 3.50/month with instant provisioning, 17 Tbit DDoS protection, and 24/7 engineer support.